Hair texture decides which of these updos suits you: curls give the Curly Updo its volume with little help, while sleek, straight hair is where the Slicked Back Bun and the Side-swept Fringe look sharpest.
Effort runs from the Claw Clip Updo, a single clip and a quick twist, to the Slicked Back Bun, which needs a smooth, even finish along the part.
1. French Twist
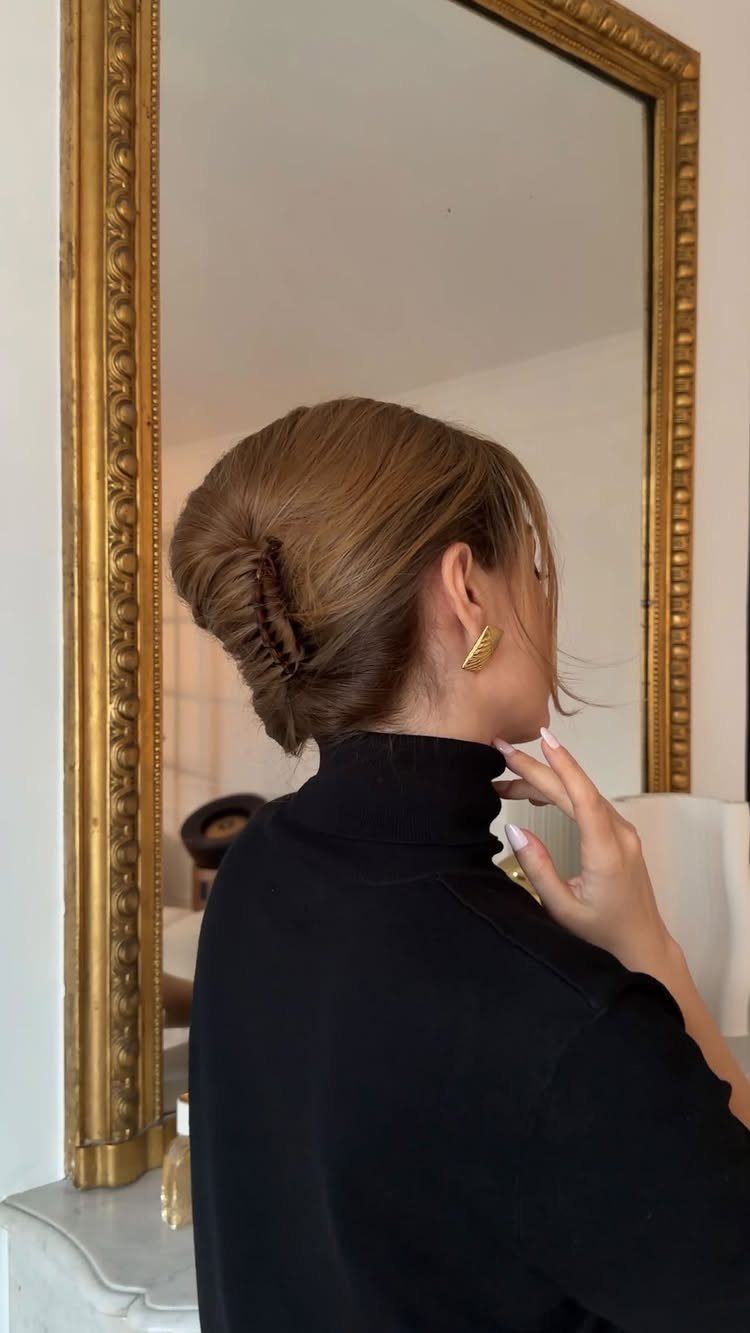
A French twist rolls the hair up along the back of the head, and one clip can hold the whole thing.
Gather the hair at the nape, twist it upward as you go, tuck the ends into the roll, then slide the clip across to lock it.
I like it with a high neckline like a turtleneck, because nothing competes with the shape of the roll. For a smoother finish, brush the hair through before you twist.
2. Claw Clip Updo
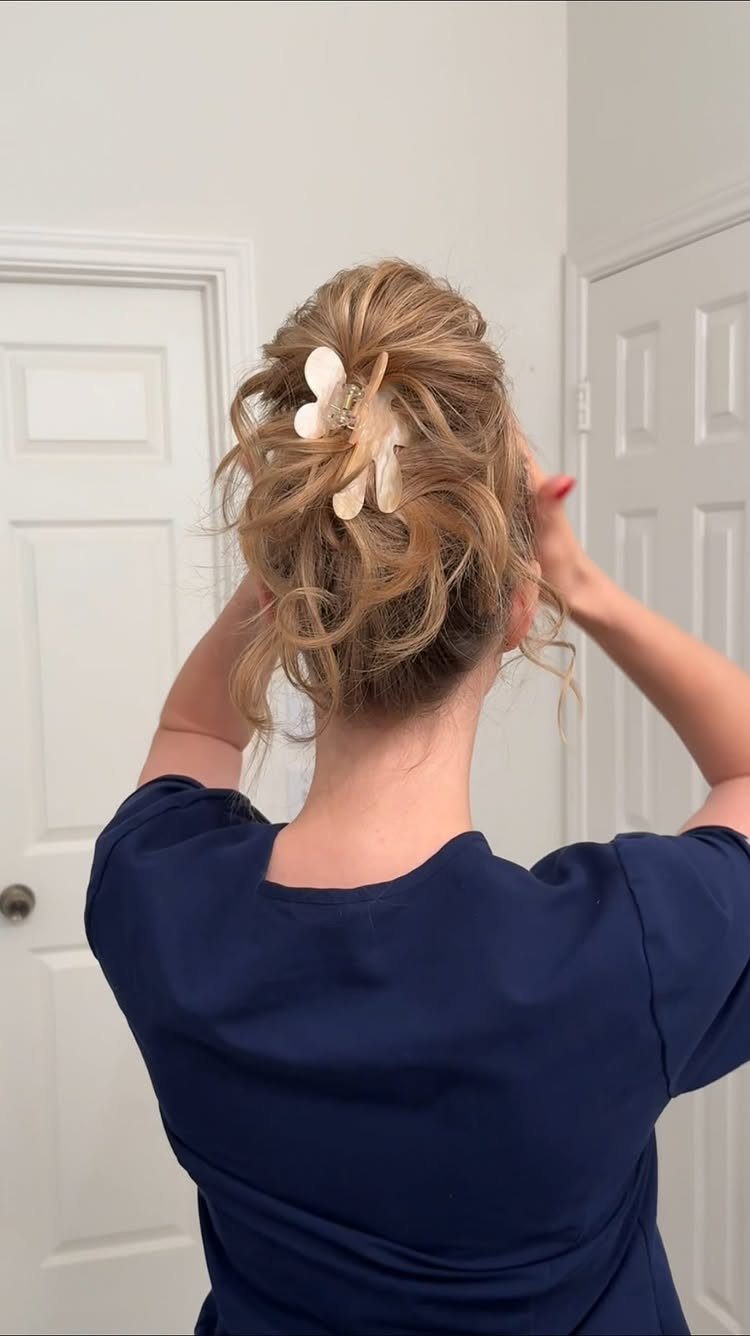
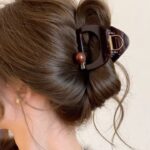
Twist all your hair into a single rope, fold it up flat against the back of your head, then snap a claw clip across the fold to hold it.
The teeth should catch both the folded part and the hair underneath, or the twist slides out within the hour.
A decorative clip, like the flower here, makes the style look planned.
A plain one in a hair-matching shade suits the office better. This works on most lengths, though very short hair may not fill the clip.
3. Messy Bun
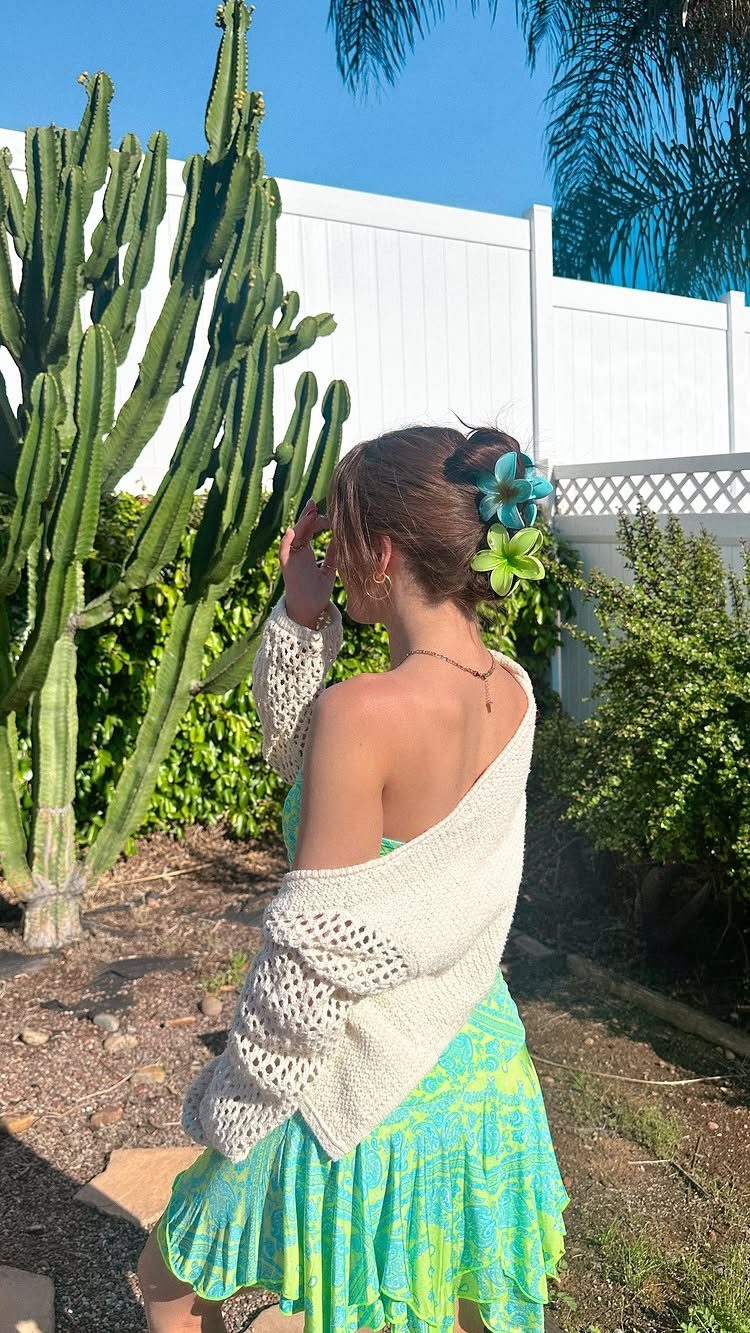
Loose strands at the front are what make a messy bun look relaxed instead of unfinished. Secure the bun with an elastic first, then tug a few pieces free around the face and loosen the bun itself with your fingertips.
Small pins can tuck in a few flowers or pin down any loose section you want to stay put.
I’d skip the brush at the end. Fingers give the softer, more uneven shape this style needs.
4. Low Bun
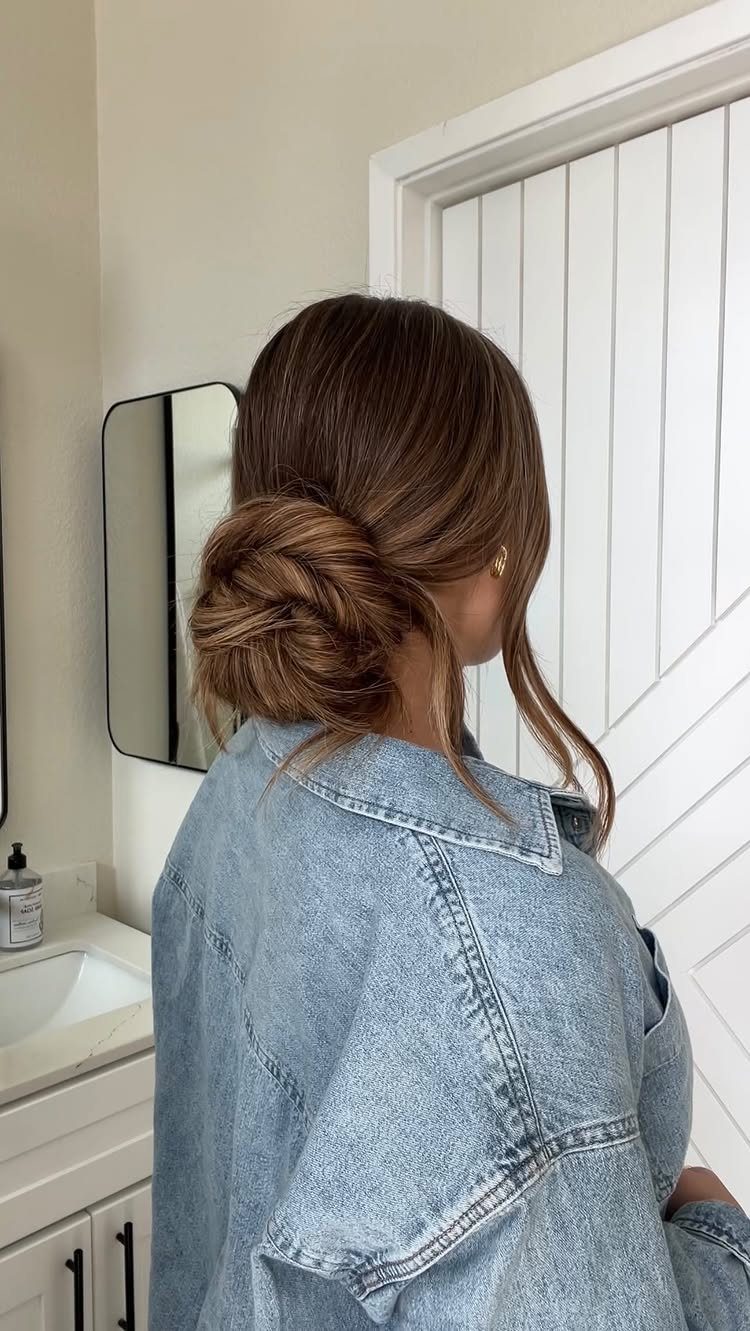
Where the bun sits changes everything: at the nape, it reads quiet and low-key, not sporty. Pull the hair into a low ponytail, twist it, wrap it around the elastic, and anchor it with a couple of pins.
Since a low bun sits below the crown, it stays out of the way of collars and jacket lapels, and it works especially well with something like a denim jacket.
I’d choose it over a high bun for anything that calls for polish with no fuss.
5. Half-up Topknot
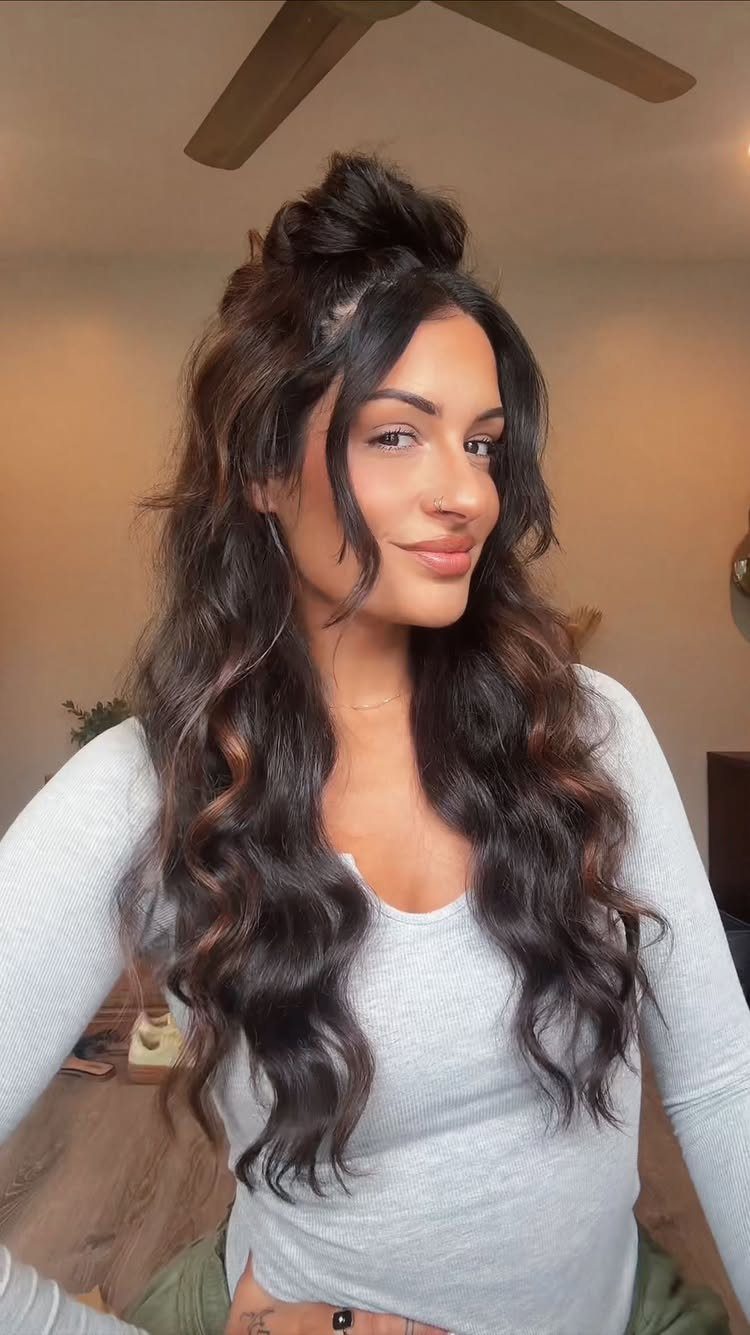
Pins carry this half-up topknot; its creator says that’s all it takes besides the hair itself.
Gather the top section at the crown, wind it into a small bun, and push the pins in from different angles so the bun stays put.
The lower hair stays down, which is why waves and loose curls suit it so well. If your hair is straight, a light texturizing spray before you start gives the pins something to grip.
6. Slicked Back Bun
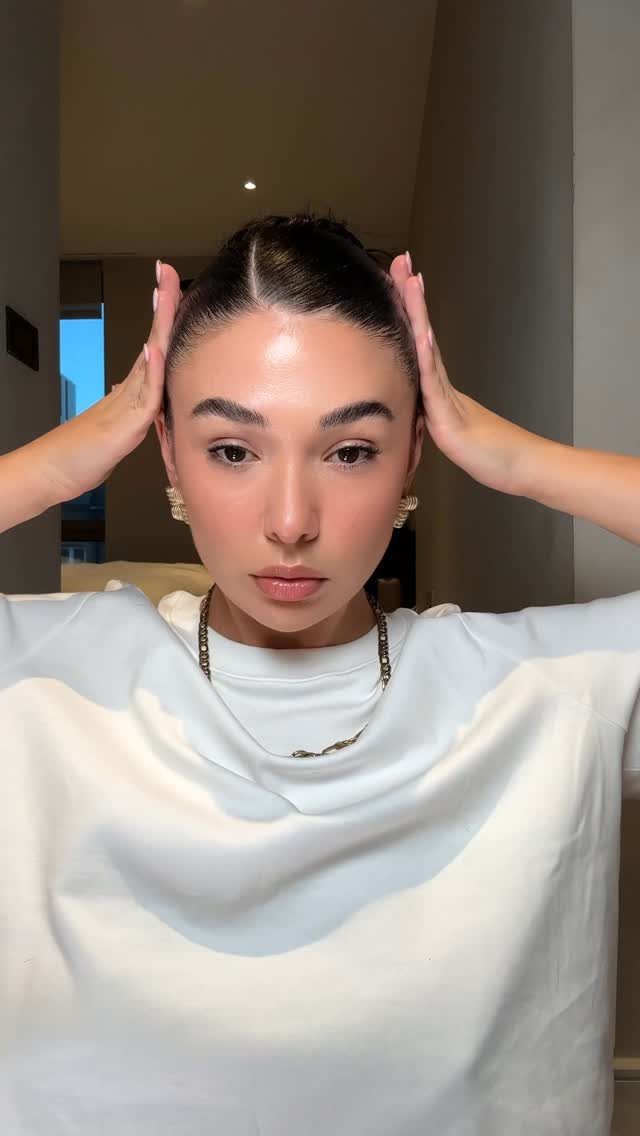
Two ponytails, one above the other, are how the creator of this look builds the slicked-back bun.
Brush the hair smooth with a little gel or smoothing cream, tie the upper section first, then the lower, and wrap the ends into a bun.
A fine-tooth comb run along the part keeps the line crisp, and a center part shows off that clean line best. This is the neatest style on the list, though it takes patience, and flyaways show.
7. Romantic Low Bun
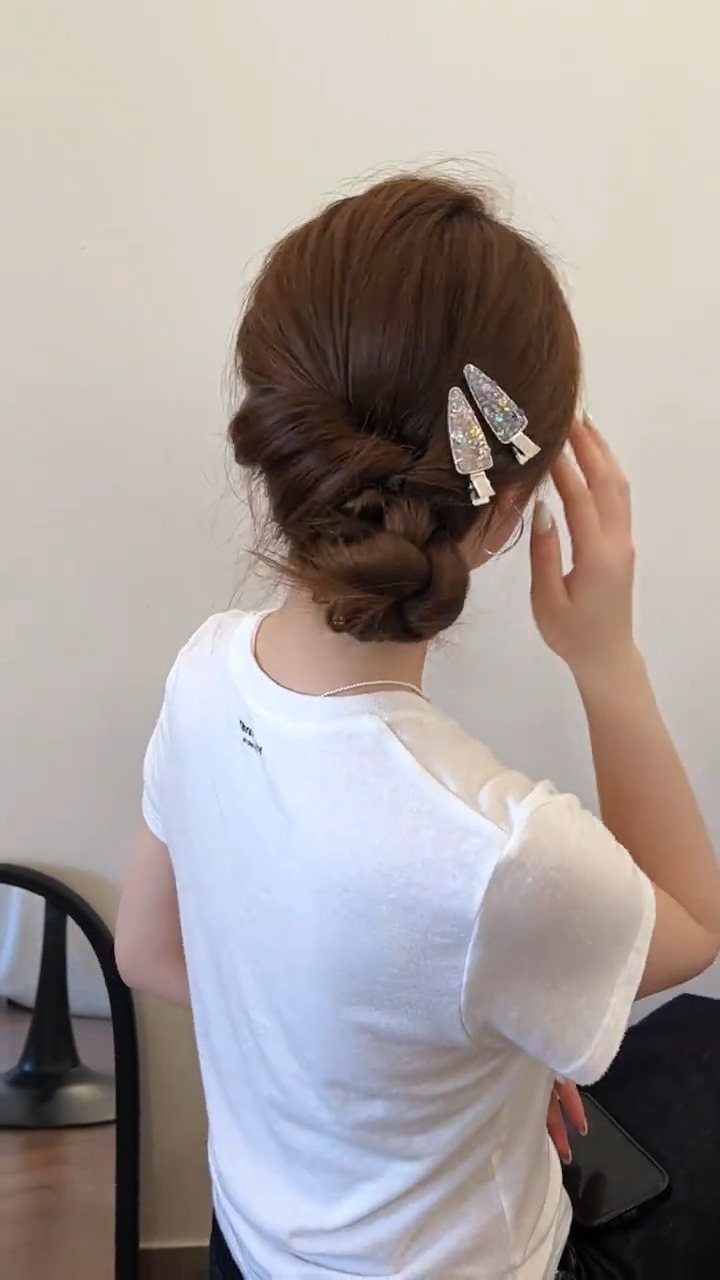
Twisting and braiding the hair to one side before coiling it into a low bun gives this style its rough, textured look.
Pin the coil at the nape, then press 2 small clips into the bun at angles; glitter triangle clips are what finish this version.
Pulling the braid a little loose after pinning keeps it soft instead of tight. A plain white tee shows off the clips well, and I’d keep the rest of the outfit quiet so the sparkle does the talking.
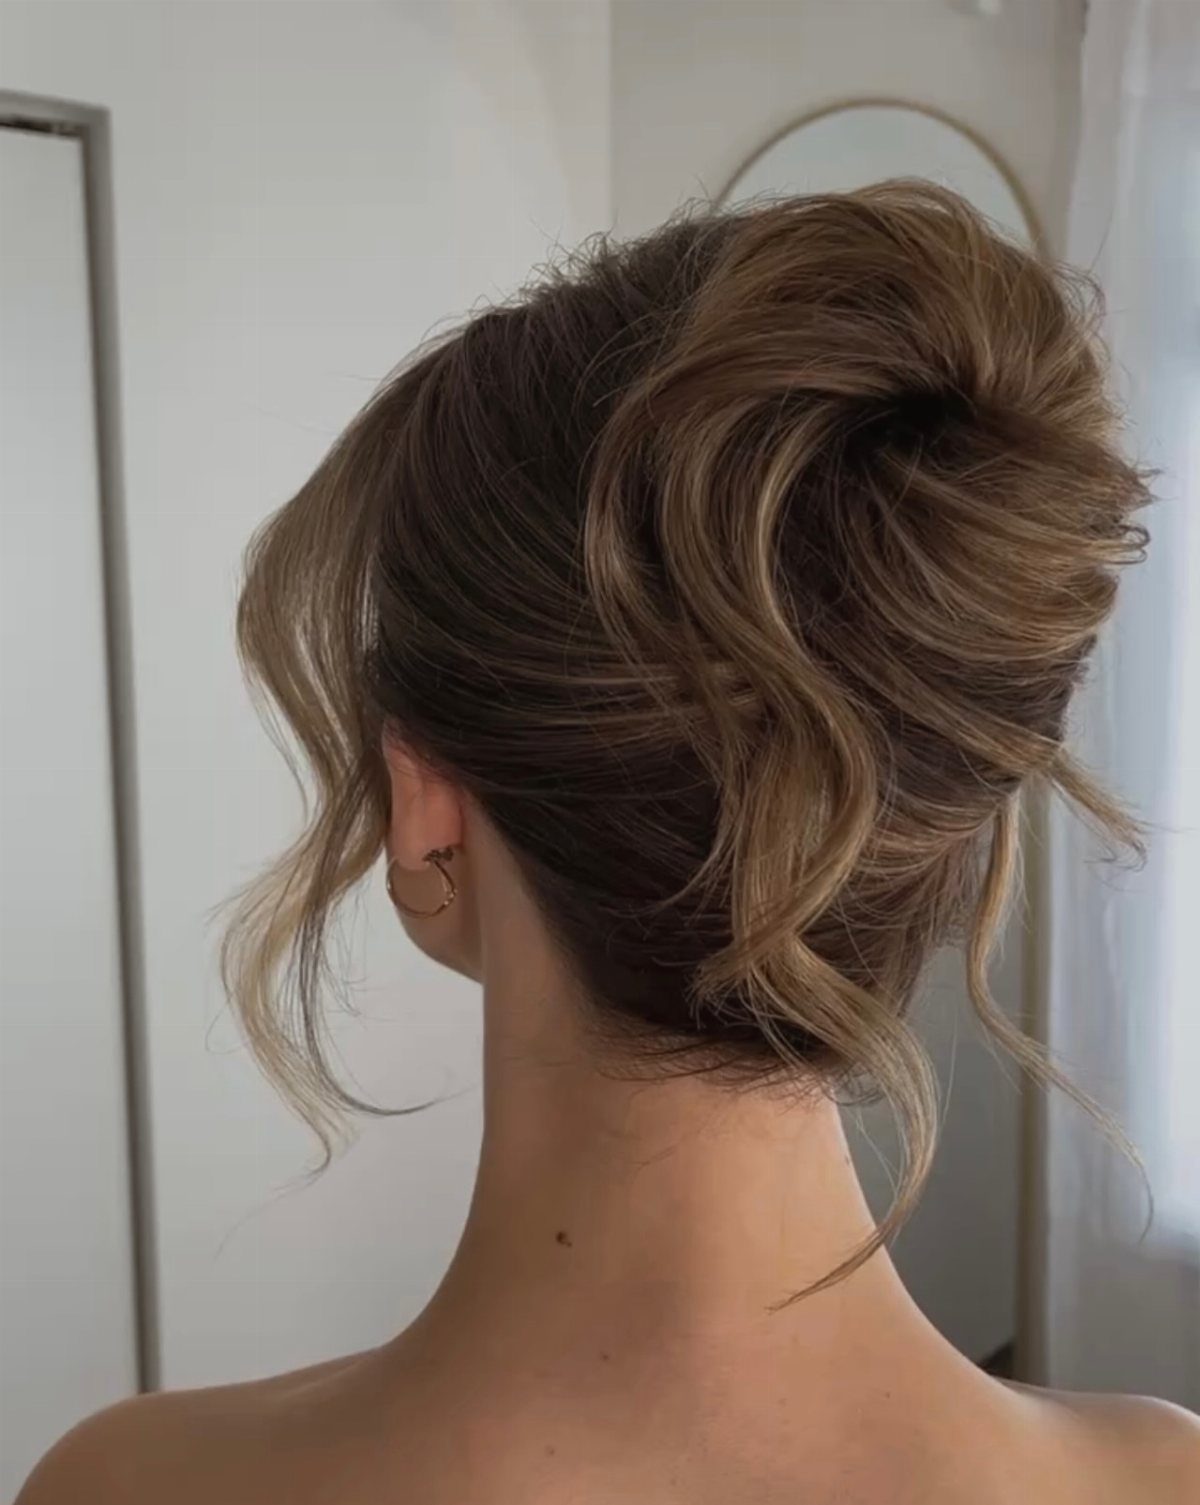
8. Wavy Updo
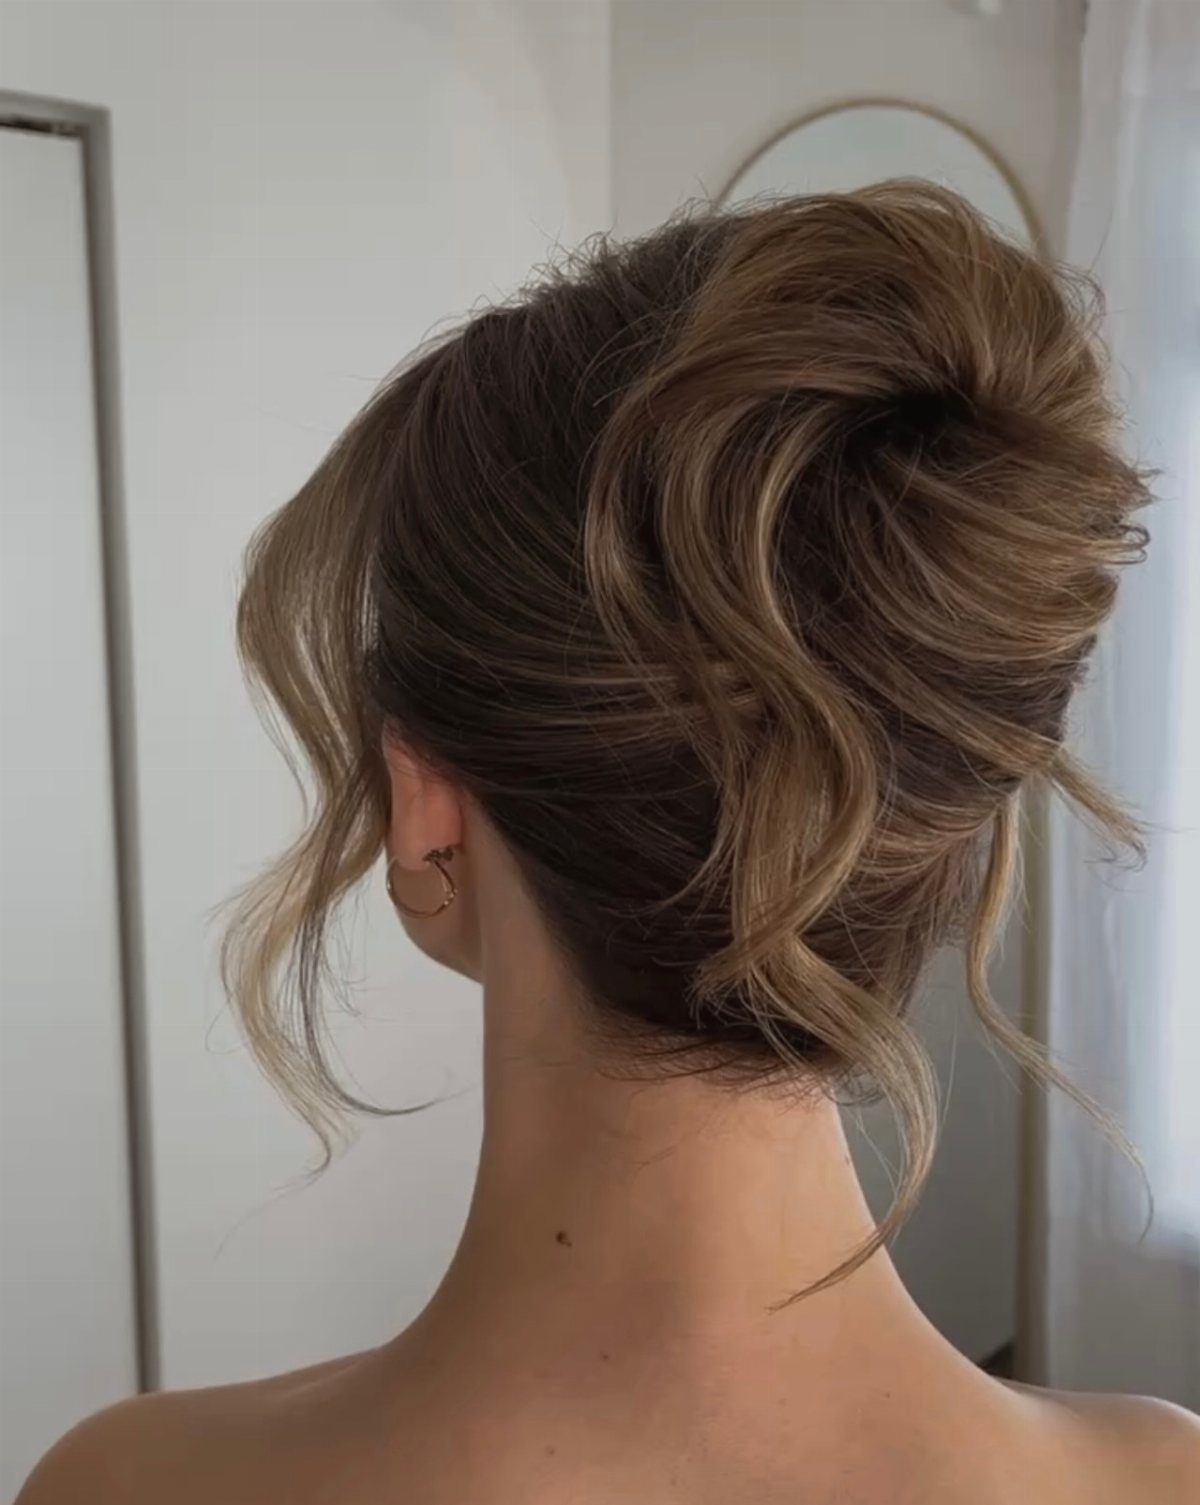
Piling waves on top of the head works because the bend in the hair does the volume work for you. Gather the waves loosely, stack them into a bun, and pin from several directions so the shape holds without flattening.
I’d leave the bun airy rather than tight. If a few waves slip out near the nape, let them; they read as intended on this style.
9. Side-swept Fringe
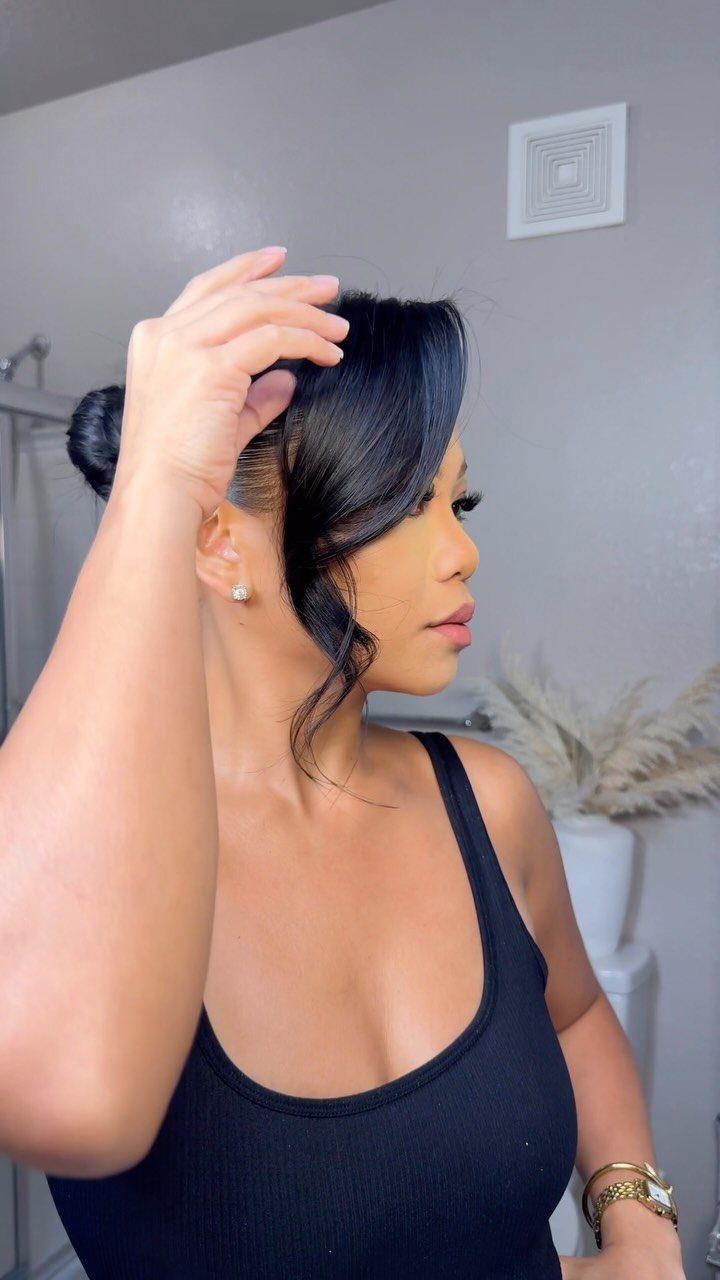
Slicking the sides back while leaving the top long enough to sweep across the forehead gives you a clean updo with one soft feature.
Smooth the sides into the bun with a brush and a little gel, then comb the top section to one side and let it fall along the face.
A side part decides where the fringe starts, so set it before anything else. This suits straight or sleek hair best; texture fights the line.
10. Curly Updo
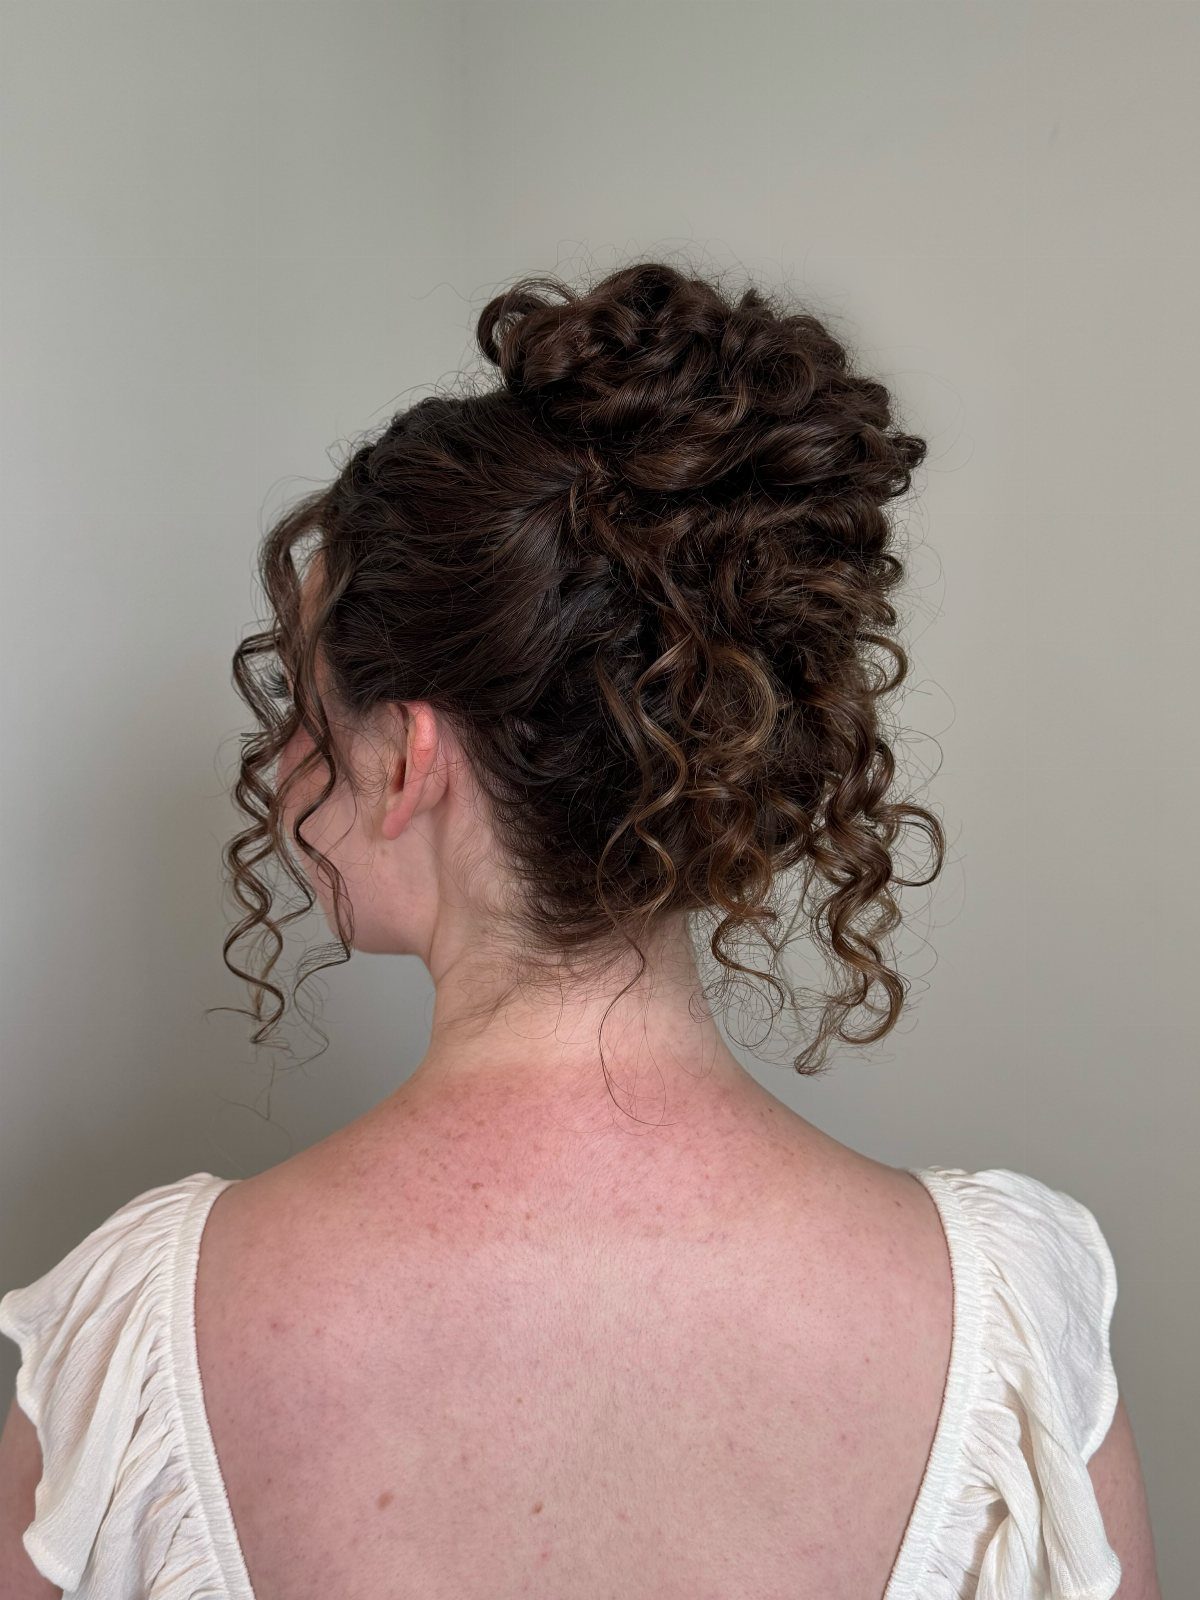
Curls already have the volume an updo needs, so pile them high and pin them without brushing them out.
Gather the hair at the crown, twist it loosely, secure it, and leave a few tendrils free around the face and neck.
Work with dry curls and finger-place each section rather than combing, since a brush breaks up the curl pattern and adds frizz. I’d pick this over a smooth bun on any day your curls are cooperating.
Adapt Styles to Hair Texture
Curls have natural grip, so pins hold in them better than in straight hair. Work with your natural texture instead of fighting it.
Shorter layers are the slippery part, whatever your texture.
Hair color and texture change how the same style looks, so judge the result on your own head, not against someone else’s photo.
Prep Hair for Better Hold
Freshly washed hair is too slippery to hold an updo. Wash it the day before, not the day of.
Goldwell Top Whip gets my vote, since it leaves the grip and grit that day-2 hair needs.
If your scalp turns oily overnight, dry shampoo absorbs the excess and adds volume. A little natural oil also helps a tousled style, so don’t strip it all out.
For extra lift, tease gently at the top and work back toward the crown. Keep a small smooth section at the hairline to brush over it, and go easy on any one area, since over-teasing shows.
Basic Tools and Accessories
Stock bobby pins and elastics in clear or a close match to your hair color, and they disappear once the style is finished.
Hairspray matters more than most people expect. Goldwell Perfect Hold is a powerful option, and KMS Dry Wax sprays on without leaving hair stiff, giving texture and letting you mold the hair where you want it.
If you check the back of your head with 2 mirrors, that setup can throw off your technique. Check pin and clip placement after each step instead of waiting until the end.
But remember, size matters… in this context, anyway. Opt for a larger clip if you’ve got thick or dense hair and a smaller one if your hair is finer, so it actually holds.
Frequently Asked Questions
How do I prep my hair for an updo?
Freshly washed hair is slick, so shampoo the day before and let it settle overnight; pins grip much better on strands with a little grit.
Goldwell Top Whip is the volumizing mousse I’d reach for: comb a quarter-size dollop from roots to ends, then blow-dry briefly to build texture.
Dry shampoo handles a scalp that turns oily overnight, soaking up the excess and adding lift at the roots.
What tools do I need for an updo?
Keep bobby pins, elastics and hairspray within reach.
Clear or color-matched pins and elastics disappear into the finished style. For spray, Goldwell Perfect Hold is strong, while KMS Dry Wax adds texture without leaving hair stiff.
Should I use two mirrors to see what I’m doing?
2 mirrors can throw off your technique because the back of your head shows up reversed, so I’d skip that setup.
Let your fingertips guide you, and after each step check where every pin or clip landed. Fixing a spot right away is easier than finding the problem once the whole style is done.
What are the best easy updos for work?
For the office, a low bun gets my vote: it rests at the nape, clears collars and lapels, and reads polished with little effort.
A claw clip updo is just as quick, as long as the clip is plain and close to your hair color and its teeth catch both the folded section and the hair beneath.
A French twist held with a single clip is another neat option.